How to Sharpen Clipper Blades With Sandpaper: Are you tired of using your barber’s clipper because yours is dull as a result of blunt blades? You might also be tired of giving out your clipper to professional sharpeners because of how it drains your pocket financially monthly.
Or you are tired of buying new hair clippers or hair clipper blades. If you can answer yes to any of the above questions, congratulations this article is meant for you, so digest it.
I had experienced purchasing a new hair clipper every now and then countless times. At first, I thought I was not the lucky type when it comes to buying hair clippers. It took me long before I realized that a hair clipper needs good care.
I did not know that I would have to clean the blades and sharpen it to maintain its edges. Before we move into that, let’s see how to use a sandpaper to make our clipper sharper.
How to Sharpen Clipper Blades With Sandpaper
- To sharpen your clipper blades with sandpaper, Place your clipper blade on a flat surface, Hold the sandpaper straightforwardly and press push it forward and backwards.
- Repeat this for like ten times on each surface on both big and small blades.
- Pull the blades on the sandpaper forward and backwards ten times as well. This will give it a sharper and shiny look!
- You can reposition it by putting the sandpaper below the blades.
How do you know when your clipper needs cleaning and sharpening?
Many people mistake a dirty clipper with a blunt clipper and a blunt clipper with a spoiled one.
When your clipper starts to pull your hair instead of cutting it, you can consider the blade dirty or blunt but if the clipper doesn’t work at all recheck the plug and electrical socket before concluding that your clipper is spoilt.
Experiencing a dull clipper blade is not a solid reason on why you should use your neighbour’s clipper.
Your clipper’s blade is something you can sharpen with sandpaper.
Since local stores can hardly be found anywhere around the city, sandpaper is the best sharpening item you can use to sharpen your clipper blades.
Before I teach you how to sharpen your clipper blade, how sure are you that your clipper needs sharpening and not cleaning? Either cleaning or sharpening, Let’s learn how to clean your clipper first.
Below are the seven items you will need for a proper blade cleaning
Toothbrush
An old or new toothbrush will do. The toothbrush will be used to brush out the junks in the teeth of the blades and clippers.
Screwdriver
A small screwdriver of the clipper’s screw size is needed. This will be used to unscrew the clipper’s bolt. A big screwdriver or smaller screwdriver won’t lose the bolt. It will just fetch you an unnecessary headache. Get the correct size.
White vinegar
You might be wondering why I chose white vinegar over blade wash. I would have preferred blade wash to white vinegar but research made it known that blade wash is linked to some certain cancers. Since prevention is better than cure, I will advise you to go for white vinegar, not blade wash. Stay safe.
Bowl
To wash your blades, a bowl will be needed to mix your white vinegar and water. You do not need a big bowl for this. A small bowl will do.
Warm water
Lukewarm water is advisable for the washing of the blades. You can boil the water before detaching your clipper or after. If you forget to boil the water before unscrewing your clipper, do well by diluting the hot water with cold water.
Towel or clean rag
Because of the damages wet blades can do to the whole clipper, get a clean dry towel or clean rag. Dry the blades after washing or after sharpening the blades.
Sandpaper
It’s the major item you will be needing for sharpening your clipper blades. It can be purchased from the local store.
Before you start to work on your clipper, consider the appropriate place to do the cleaning and sharpening. Why?
The sharpening of your clipper blade is a messy activity. Water can spill while washing the blades so what do you think will happen if you are doing the washing beside your laptop or any other electronic devices?
The hairs stuck in between the blade’s teeth can be blown to any direction of the house when being brushed off the blade. So the kitchen is not a suitable avenue when cleaning your clipper.
The best place to use is either the bathroom, Garage or dining table. When using the dining table, remember to take away or cover all the consumable items so as not to eat hair in your next meal
Cleaning and sharpening of your clipper blades is not complex but you could damage your clipper beyond repair if care is not taken.
You can get a professional to handle it but here are some facts about getting a professional
They will charge you more than your clipper’s worth
Three Reasons why professionals charge expensive is that they calculate the total amount of time they will spend cleaning and sharpening the blades. The dirtier the blades the higher the Price.
Professionals consider the cleaning duration. If a professional wants to sharpen your clipper blades, the first thing they ask is “when will you collect it”?
You can’t expect a professional to sharpen your clipper blade for you at a cheaper price if you want it done between 24 hours. The best is to give them more than enough time or else you will be charged more than your clipper’s worth.
The third reason is that professionals will surely want to gain from the services being rendered. They do add money to the items they use so all this in total makes it expensive.
You can actually do well more than some professionals:
I am not trying to sugarcoat or ruin some professionals’ image. Many of these so-called professionals know nothing or little about it but with the help of articles like this, they were able to understand it. So what is your excuse? You can do it.
If the following steps are carefully digested, that clipper that has been pulling your hair will be reincarnated.
Can you remember the last time you cleaned the junk in the blades? If you use the clipper for the public or dogs you are advised to clean the clipper frequently at least. every two months.
Dogs’ furs are thicker than human hair so this requires regular cleaning and sharpening of the bladder.
What if the clipper is personal property? You are advised to clean it at least once in six months. You don’t need to use a timetable for this. Can and sharpen your clipper before it starts to malfunction.
How do you clean your blades properly?
The blades are attached to the clipper with screws. Use a screwdriver to unscrew it and remove the blade from the clipper. How do you clean the blades and the clipper?
A toothbrush is the most useful cleaning material you can use. Use a toothbrush to brush out all the junks in the blades and inside of the clipper. Brushing out the hair in both clipper and blades doesn’t mean you should not sharpen your clipper. If the clipper still works bluntly after cleaning the blades you can see proceed to wash it.
What if the blades have rusted? Do you consider disposing it as the best option?
Buying another new hair clipper or blades doesn’t mean the new ones won’t rust as well So get your small bowl ready and put in it white vinegar with lukewarm water.
Dip cotton wool or toothbrush into the white vinegar or clipper blades wash products ( Remember clipper blade wash products Is optional) then use it to scrub the blades. Be careful when scrubbing it. Avoid anything that will distract you so you won’t end up cutting yourself.
After scrubbing away the rust from the blades don’t fix it back yet.
If Blade wash products are scarce or expensive, hot soapy water or vinegar can do the trick as well.
What do you think will happen to your hair clipper if you fix a wet blade to it?
I’m sure its longevity will be reduced. So what will you do?
Get a dry clean towel and dry the blades. Fix the blades to the clipper with the screws.
Plug the clipper into an electronic socket and check its sharpness. If it is sharp enough, do not underestimate the power of lubricating oil.
Lubricate the blades and this will give it the proper friction it needs.
Remember this is a two in one article. You had learned how to clean your clipper now I would teach you how to sharpen your clipper with sandpaper.
Sharpening your clipper blades with sandpaper, How to do it

Sharpening your clipper with sandpaper is not an energy-draining activity as you may have thought it is.
It does not take time as well. Its time duration is a maximum of ten minutes.
Interesting! Isn’t it?
Row up your sleeve and get sandpaper in the local hardware store.
As long as your clipper is clean, you are good to go.
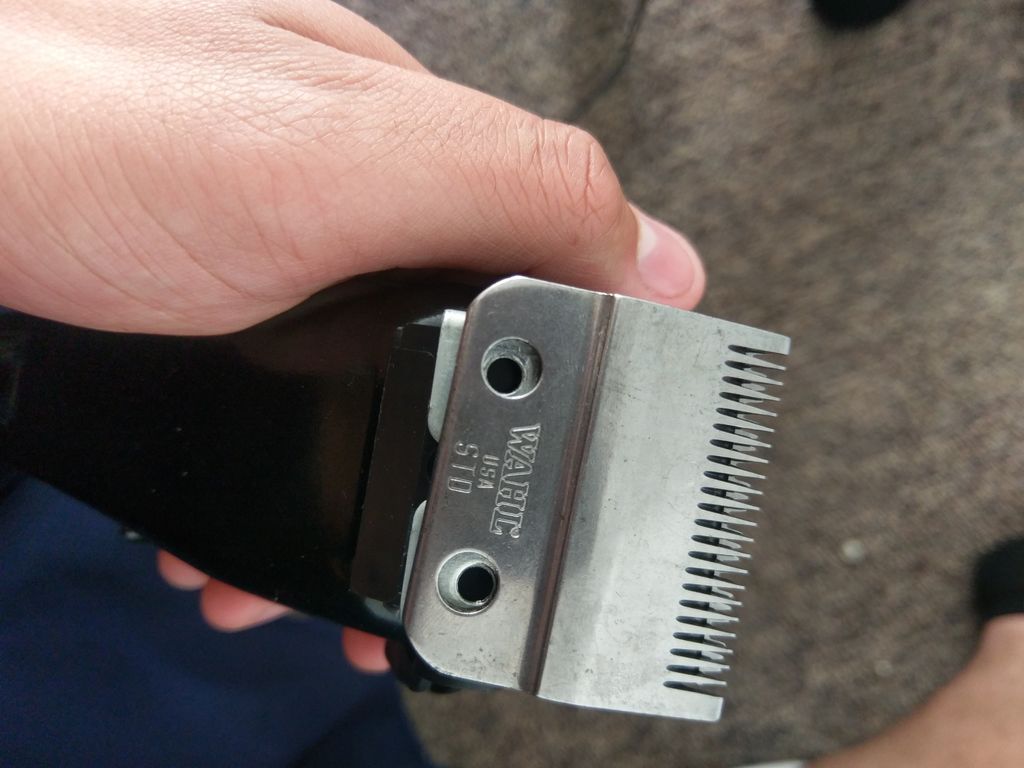
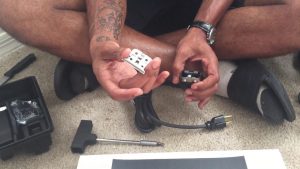
Step 1: Remove the blades
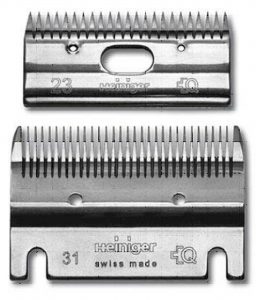
To detach the two blades from the clipper, you have to unbolt the clipper. The two blades have two surfaces each and that gives you four surfaces that slide together while in operation. To begin with, examine the four surfaces and get your sandpaper ready on a flat surface. Be safety conscious when holding the blades so as to avoid cutting yourself.
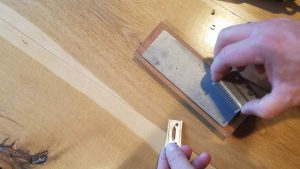
Step 2: Time to sharpen
Place your clipper blade on a flat surface.
Hold the sandpaper straightforwardly and press push it forward and backward. Repeat this for like ten times on each surface on both big and small blades. You can reposition it by putting the sandpaper below the blades.
Pull the blades on the sandpaper forward and backward ten times as well.
Step 3: Get a new sandpaper
To get a very sharp clipper blade, changing the sandpaper is necessary. The sandpaper you used to sharp the four surfaces may have been worn out and this may prevent the blades from being very sharp.
You can either place the blades on the sandpaper or the sandpaper on the blades. Whichever way it pleases you, pull the two objects against each other forwardly and backwardly for five times and you will have an excellent result.
Step 4: Inspect the blades
A well-sharpened hair clipper blade shines with a smooth surface and texture.
But what if yours is not shining, not to talk of smooth?
Do not give up. That doesn’t mean the blades are totally useless. It just means you did not put much pressure and energy in sharpening the blades.
Get the latter sandpaper or get a new one. Resharpen once again and I bet the result will be sparkling clipper blades.
It is very easy to be lazy when sharpening clipper blades with sandpaper or Emery cloth.
I know this because I had once been in that category. You get lazy because you are tired and tiredness arrives when you try to sharpen the two blades at once.
This is what I mean.
You might be tempted to sharpen the blades at once but don’t try to.
It is of no crime to sharpen the big blade first. Sharpen the first two surfaces first. Make sure it is smooth and glittering then drop it and start with the small blade.
When sharpening the small blade, be safety conscious as well and you grit with energy though it is not energy-draining but put in some effort.
Step 5: Clean the blades
Since the blades have been clean before sharpening, washing it is of no use. So how would you clean the blades? A piece of clean cloth will do. Use a piece of cloth to wipe away the scrapped pieces of steel on the blades.
After being sure that the blades are free from the scrapped dirty, make use of the screwdriver to bolt back the blades to the clipper.
Is this sharpening method not an easy and fantastic one?
I am sure it is. So what next? Check the next step.
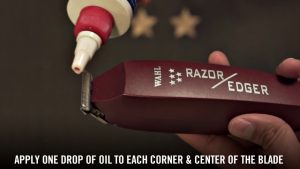
Step 6: Lubricating the hair clipper is a must so never run out hair clipper oil
After fixing back the blades to the clipper, do not forget to oil it. Leave the oiled clipper for some minutes. This will give the oil the opportunity to penetrate to the oil needing area of the clipper.
Afterward, test the sharpness of the clipper blades. Oops! What if you have no hair to barber for beards to trim? You can keep the clipper for your next use.
Can you see how easy it is to sharpen clipper blades?
Once you get your sandpaper from the hardware local store, clean your blades, you are good to go. Never forget to put safety first when handling the blades so as to prevent home accidents. Lubricate your clipper often and have a nice haircut either for you or your dog.
How to Sharpen Clipper Blades With Sandpaper – Frequency
I can’t give a point black answer to the above question. This is because the way you use your clipper is different from the way another person will use his (in terms of how often).
But the definite requirement is that you should sharpen them every six months.
Just like I have said at the beginning of this article, An easy way to tell when your clippers need sharpening is when they pull hair or nick skin. But you need to sharpen your clippers before that happens, especially if you are a salon owner as you will be using them on people.
If you are the kind of barber that puts your clippers through so much hair, then there is a need to sharpen them every two months.
So my best advice is that you should sharpen them once their performance declines enough for you to notice…even at its slightest.
Your clipper blades should always work as amazing as they worked when you first bought them.
How to look after your clipper blades so that they last longer
If you have been reading through, you will notice that I always emphasize the need that clipper blades be looked after properly. When you disregard this, it not only affects the life of your blades but more costly, the life of your clipper.
Good care will help keep your clipper blades sharper for longer and will dramatically reduce wear and tear on your clipper.
So before I put an ending full stop to this article, I will show you the best three ways to look after your clipper blades so that they last longer and remain effective as though you just bought them.
1. Clean your Clipper blades
When I began writing this post, I decided to share with you how to clean your blades properly. So you will probably understand this step easily.
Like I mentioned earlier, clipper blades need to be cleaned periodically while clipping. There is no point in lubricating a dirty, gritty blade; it will still go blunt quickly!
Remove excess fur and grit from around the blade with a stiff brush (similar to a toothbrush). You can blow excess fur from the blade, but expect to get a fair share in your face!
Using a small container, create a pool deep enough to immerse the blades. Turn the clipper on, with the blade attached. Run the blade in the pool of whatever liquid you choose to use. You should see tiny bits of fur washing from in between the teeth of the blades. Depending on the build-up, the blades should start to run more freely, causing the motor to run slightly easier and quicker.
Wipe the back of the blade with an oil-soaked cloth and then follow steps below for oiling them quickly and thoroughly.
It is possible to take clipper blades apart, this will enable you to clean your blades very well, but is time-consuming and if you not sure how to put them back together properly, you may end up stopping the blade working totally!
We will soon have a video guide showing you how to reassemble a clipper blade but until then, just in case, don’t take them apart unless you know what you are doing!
Use a stiff brush (an old toothbrush is ideal) to brush any or all of the above from the cutting surfaces. Slide the comb to one side, clean both cutting services, slide the comb the other way and do the same again.
Never leave blades without oiling after cleaning. Else, you’ll invite RUST!!
This brings us to the second step that deals with oiling or lubricating.
2. Ensure your blades are lubricated all times
Oil means less friction. Less friction means less heat. Excess heat can cause a clipper rash and an unhappy animal! Friction also causes blades to go blunt quicker.
Good quality clipper oil is best. Most clipper manufacturers have their own clipper blade oil. Many people use WD-40 as a convenient alternative. As a spray, WD-40 is too thin and evaporates quickly. Oil can be used as an effective wash, WD-40 in a spray can form cannot be effective as a wash and actually fur and dirt stick to it, having an adverse effect. WD-40 in a pot, used as a dunk is no good either.
Let’s say you are in a situation where the amount of oil you use doesn’t bother you, then, using a small container, create a pool deep enough to immerse the blades. Turn the clipper on, with the blade attached. Run the blade in the pool of oil.
Do not leave the clipper blades to soak in blade wash because of the high water content, try to wipe the clipper blade dry as much as possible.
If you wish to conserve your oil, tip some in between the teeth and at the back of the cutter while the blade is running, basically wherever the two blades come in contact with each other.
3. Store your blades properly
After being washed and lubricated for the final time before storing them, they should be wrapped in an oil-soaked cloth and stored in a moisture-free area. If a blade goes rusty, it will go blunt so quickly. Rust won’t be any good in a surgical environment either.
Following the steps above will elongate clipper and blade life, however, it will not make them immortal! When they eventually go blunt and stop working, send your blades to us for our Clipper Blade Sharpening service.
Lubricating your clipper blades after sharpening with sandpaper
Apart from sharpening your clipper blades properly with and diy option lime sandpaper, how you lubricate your clipper blades is very important. This is a section that will determine the performance of the blade when in use.
A clipper definitely needs oil to perform well just like a car will need engine oil to reduce wear in the moving parts.
Most parts in a clipper or electric razor will come in contact with each other when the machine is in use. This can bring about a wear and tear if proper oil or lubrication is not applied.
While it is advised to oil your clipper blades regularly and after sharpening and cleaning, below are the importance of oiling/lubricating clipper blades.
It minimizes friction
Heat is always generated from the friction that occurs between the foils and blades. It is when you apply clipper oil to the clipper that the heat from this friction is reduced. Consequently, piling of blades can reduce the risk of razor burn, irritation, and blemishes. Don’t be surprised that this little procedure can save you the money of buying new blades or foils as they prolong the life of these parts of the clipper.
Improves performance of shaving.
It is expected for the performance of a clipper to start going down when the clipper is constantly used. This will be caused by the wear and tear of the blade. In the same connection, the shaving performance or closeness of shaving of the clipper or Shaver will reduce. It may get to a point where only replacement of blades is the best option.
But when you regularly lubricate your clipper with the perfect clipper oil, your clipper will give you that close and sharp and comfortable cut that you want. You can even apply a bit more pressure to get a smooth and close shave as long as the generated heat has been reduced.
Makes the motor stronger
A clipper with a weak motor is as good as dead. Lack of lubrication on the clipper after sharpening or cleaning will allow the clipper motor to work too Hard to cut hairs. This may consume not only power but time. To allow the cutting parts glide with minimal resistance, use a lubrication oil.
Buying a clipper oil can be a difficult task for people who know what they are doing because when you look out for a clipper oil, you will want one that will do what it has been made for.
Most clippers and electric Shavers will come with their oil but you will need more. When I came across Premium Lubricating White Oil for Hair Clippers, I knew it was something I can recommend for my readers. The oil Protects your cutting equipment from rust and corrosion. Ensuring a prolonged life for your clipper and razor.
With just a few drops of the Premium Lubricating White Oil, the cutting performance of your clipper will improve,reducing any chances of irritation while in use. You can click here to check it out
How to Sharpen Clipper Blades With Sandpaper – Final Words
I hope this article has been able to not only address how to sharpen clipper blades with sandpaper but also touched areas pertaining to clipper blades maintenance. Let me know if you’ve got any questions in the comments section. Thanks for reading!